4Comply Eloqua Cloud App Documentation
Introduction
4Comply is a privacy compliance solution that enables companies to manage consent and permissions, fulfill privacy rights requests and respond to privacy inquiries from regulators. The 4Comply Eloqua Cloud apps seamlessly integrate with Eloqua on the campaign and program canvas.
The following document explains how each of the 4Comply apps works and how to implement them in Oracle Eloqua.
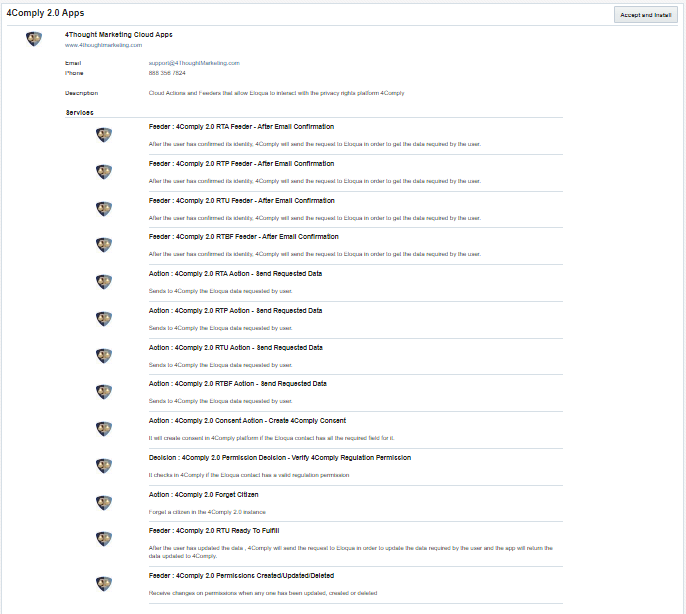
The suite of apps is composed of the following items:
Feeders:
• RTA Email Confirmed
• RTP Email Confirmed
• RTU Email Confirmed
• RTBF Email Confirmed
Actions:
• RTA Send Requested Data
• RTP Send Requested Data
• RTU Send Requested Data
• RTBF Send Requested Data
• 4Comply Create Consent
Decisions:
• Validate 4Comply Permission
Initial Configuration
Before installing the 4Comply Eloqua Cloud Apps, you must oobtain the Tenant ID and the Secret Key provided by your 4Comply Dashboard at https://dashboard.4comply.io
Get keys from 4Comply Dashboard
1) Go to the Settings section in the dashboard
2) Copy the Tenant ID and the Secret Key

After that, please follow these instructions to set up this cloud app in your Oracle Eloqua instance.
- Log in to Oracle Eloqua.
- Click on Get App below to install.
NOTE: If prompted to log again, please do so.
- In the next screen, click “Accept and Install”
Configure 4Comply keys in Eloqua
1) Go to the Settings section in Eloqua
2) Go to Apps

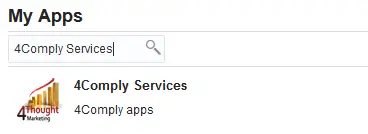
3) Search for “4Comply Services” and click on it
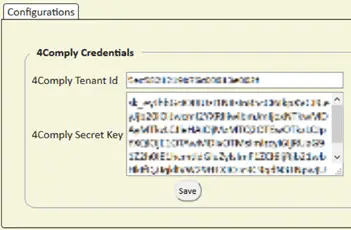
4) Go to the Configure Section
5) Copy the 4Comply Tenant ID and the Secret Key in the corresponding fields and Save
Eloqua Feeders
Pre-Process
Every time a 4Comply form has been submitted for any of its rights (RTA, RTP, RTU or RTBF) an email is sent to the user who have requested any of the rights. Once the user confirms its identity by clicking on the email link provided by 4Comply, the request is sent to Eloqua, therefore Eloqua will provide the information requested to 4Comply and this one to the user.
Commonly the Feeders and the Actions are used together, the Feeder will receive the request and then the Action will provide the data to 4Comply, it could exist a process in between the user request and the time Eloqua provides the information required, but, for the guidance process Feeders and Actions will be one after the other.
Program example:
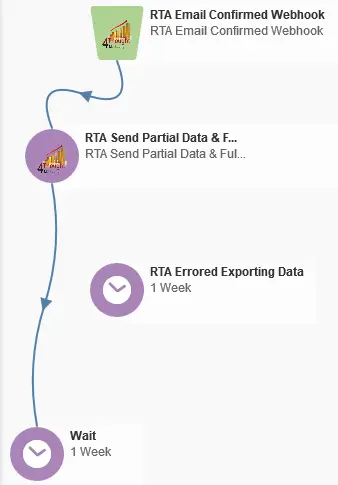
Feeder Configuration
Configure “RTA Email Confirmed” Feeder
- Drag and drop the feeder in the canvas, double click on it and go to configure
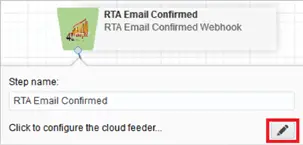
- In the following screen one contact field must be selected to store the Request Id, this field is used to store the Id of the request created by the user when the form was submitted, then the Request Id value will be used by the Cloud Action to send the requested data back to 4Comply

- If the section Configure 4Comply keys in Eloqua has been configured the Webhook will be created automatically. In case it needs to be configured manually copy the Webhook URL and paste it in the Webhook configuration in 4Comply. The Webhooks option can be found on the left-hand side menu at the bottom, click on it and then select Add New as shown below
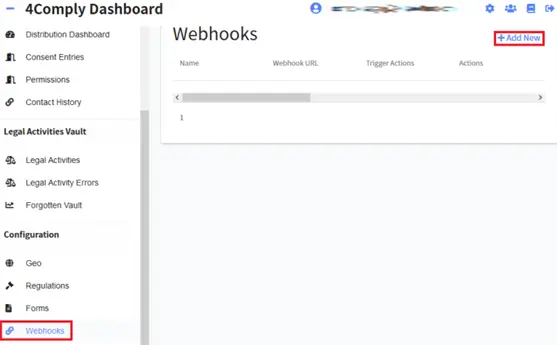
- Once Add New has been clicked the URL copied from Eloqua must be placed in the Webhook URL field. Provide a name to the webhook and select the corresponding action, for this specific case, the action for RTA Email Confirmed must be RTAEmailConfirmedWebhook and finally click on submit.

Configure Additional Rights for Email Confirmed Feeders
The process to configure feeders and webhooks for other rights (RTP, RTU or RTBF) is exactly the same as the one shown for RTA in the previous reference. The unique difference in the process is the Trigger Action selected in 4Comply when the webhook is configured.
The following list of Trigger Actions can be used to configure webhooks for RTP, RTU or RTBF.
• RTP Trigger Action = RTPEmailConfirmedWebhook
• RTU Trigger Action = RTUEmailConfirmedWebhook
• RTU Fulfillment Trigger Action = RTUReadyToFulfillWebhook
• RTBF Trigger Action = RTBFEmailConfirmedWebhook
Eloqua Actions
Introduction
Eloqua has 2 different types of cloud actions to work with 4Comply:
• Type 1: Cloud Action to send the data requested by the user (RTA, RTP, RTU or RTBF)
• Type 2: Cloud Action to create consent from Eloqua
The first type is just to return to 4Comply the data that a user has requested via 4Comply, these actions usually work together with the feeders (previous topic).
The second type will create a consent entry in 4Comply and its corresponding permissions based on a combination of field values.
Action Configuration
Configure “RTA Send Requested Data” Action (Type 1)
- Drag and drop the action in the canvas, double click on it and go to configure
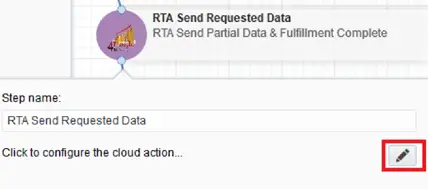
- Select the contact field where the Request ID has been stored by the feeder (previous topic). This value will work to identify which user requested the information.

- Then the fields to be sent to the user who requested the data must be selected

- The last step is to determine if the Fulfillment Complete field should be checked. By checking this field 4Comply will know that the data can be sent to the user immediately, if this field is not checked then 4Comply will wait for an external process to determine when the fulfillment has been completed. Is recommended to mark the checkbox. Finally save the configuration.
Configure Additional Rights for Send Requested Data Actions
The process to configure actions other rights (RTP, RTU or RTBF) is exactly the same as the one shown for RTA in the previous reference. The unique difference is that the action for RTBF does not require a fulfillment field.
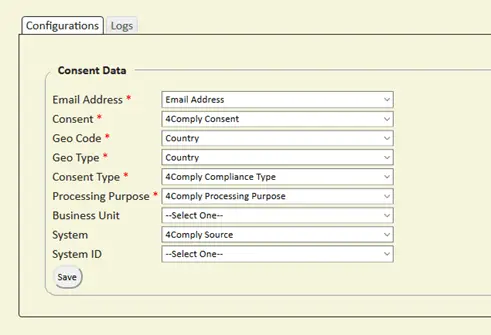
Configure “4Comply Create Consent” Action (Type 2)
This action will be in charge of creating a consent entry in 4Comply, each consent entry could have derived consent entries associated, this is dependent on the values sent in Country Code and Permission Type.
Country Code: Will determine the regulation to use, for example, France (FR) will use the GDPR regulation.
Permission Type: Will contain the explicit permission to be used in conjunction with the regulation determined by the Country Code.
Different combinations of the fields mentioned before will reflect different results in 4Comply.

A Country Code = “FR”, Permission Type = “Process Data”, Consent Code = “no” and Email Address = “[email protected]” and Processing Purpose = “CRM Record without consent” will generate the following entries in 4Comply.
Consent entries

The steps to configure this action are:
- Drag and drop the action in the canvas, double click on it and go to configure

- Drag and drop the action in the canvas, double click on it and go to configure
Using Decision Steps
Introduction
The decision step in Eloqua, will verify in 4Comply if the contact that is in the Eloqua campaign has the corresponding Permission Type and if the expiration date is still valid to receive a marketing email.
The Permission Type configured in the decision step must match the values in 4Comply.
Decision Configuration
Configure “Validate 4Comply Permission” Decision
- Drag and drop the action in the canvas, double click on it and go to configure
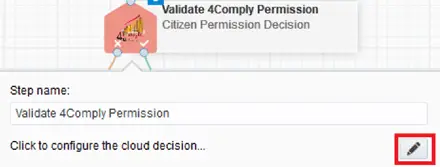
- In the following screen it is required to configure 2 fields, the Webhook ID and the Permission Name. If the section Configure Configure 4Comply keys in Eloqua has been configured the Webhook will be created automatically. In case it needs to be configured manually copy the Webhook URL.

- Then paste the Webhook URL in the Webhook configuration in 4Comply. The Webhooks option can be found on the left-hand side menu at the bottom, click on it and then select Add New as shown below.
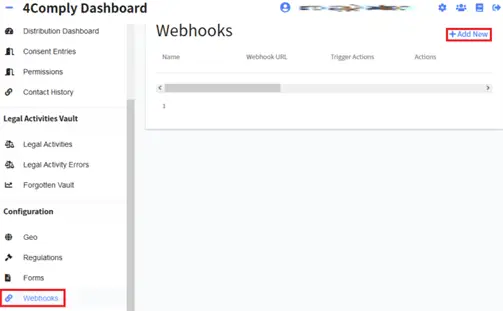
- Once Add New has been clicked the URL copied from Eloqua must be placed in the Webhook URL field. Provide a name to the webhook and select the corresponding action, for this specific case, the action for RTA Email Confirmed must be BulkRequestPermissionsDelivery and finally click on submit.

- Copy the Webhook ID from the URL
- Go back to Eloqua an open up the decision configuration screen. Copy the Webhook ID in the corresponding field and fill out the Permission Type.

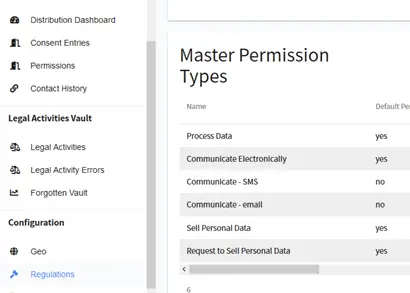
Make sure the Permission Type matches the permissions in 4Comply. These can be found in the left-hand side menu under the Regulations option.
