Many-to-One Email Cloud App Documentation
Purpose
With the Many-to-One Email cloud app, you can create highly personalized emails to contacts with complex many-to-one relationships. This is accomplished by updating Contacts with Custom Object data, regardless if it’s the first, fourth or last custom object record within a particular Custom Object.
This document describes how this Cloud App can be used in Eloqua’s Campaign Canvas. The app can also be used in Program Canvas.
Installation
Please follow these instructions to set up this cloud app in your Oracle Eloqua instance. The Many to One Cloud App requires the installation of two cloud apps.
Step 1 – Install the Many to One Cloud App
- Log in to Oracle Eloqua.
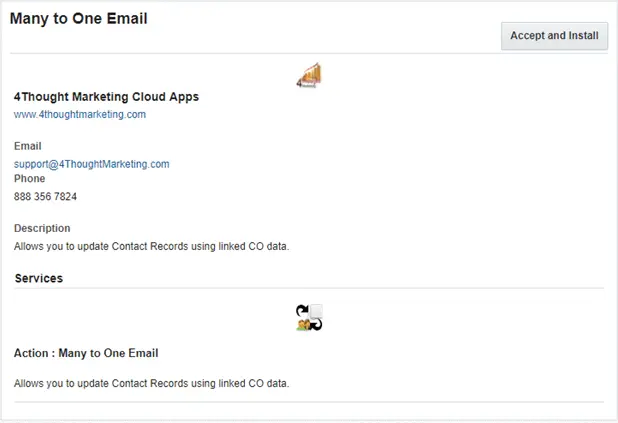
- Click on Get App below to install the Many to One Cloud App.
NOTE: If prompted to log again, please do so.
- In the next screen, click “Sign In” and then “Accept”
- On the next screen, click “Sign In” and then “Accept”
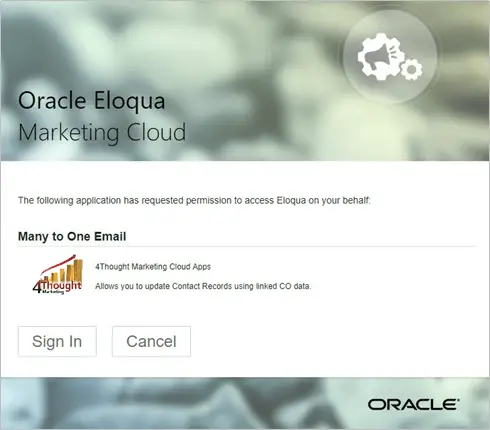
- Your Many-to-One cloud app is ready to be used.

Step 2 – Install the Many to One Reset Cloud App
- On the next screen, click “Accept and Install” on the top-right section
Add Optional Fields to Custom Object and Contact
If you know that there will be multiple records for each email address, you will need to add one text field to your CO and your Contact. These fields are used to flag that a specific CO record has been processed and if additional records match the filter for a contact. You can name these new fields as you’d like. They should be created as text fields, as the app will write text values into them. Configure them as shown below:

How To Use
The following instructions show the basic use of the app. You can incorporate this Cloud App into any existing campaign.
Create/Open a Campaign
Click on “Actions” on the top left side, then “Show All Steps”, and then locate the “Many-to-One Email” Cloud App under the Actions options (colored in purple).
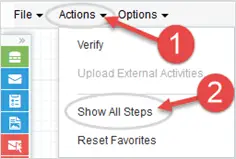
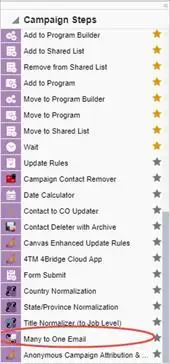
Drag and drop the cloud app to the canvas area. Connect the corresponding elements to the dropped cloud app.
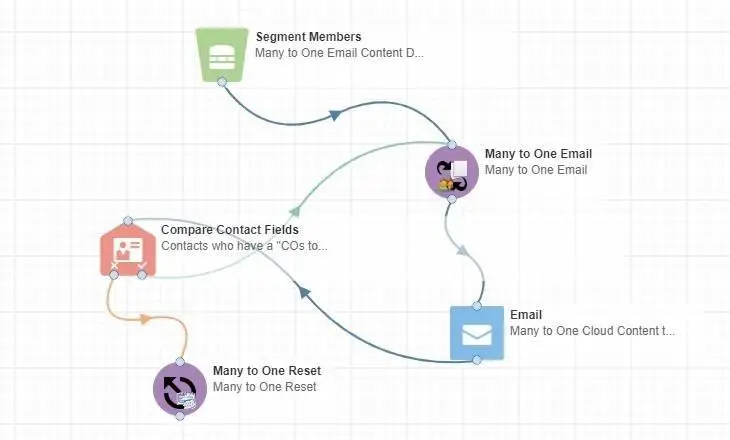
Double click the Many-to-One Email step icon. You will see some options for this element.
Rename the step if needed
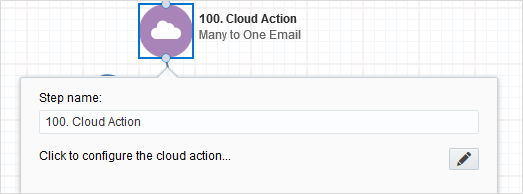
Click the pencil icon to open the settings for this step.
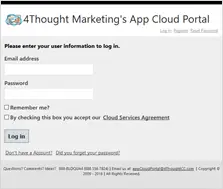
You will need a 4Thought Marketing App Cloud Portal user to log in and configure this app. If you don’t have one, you can create one. If you do, use your user to log into the page shown in the following screenshot:
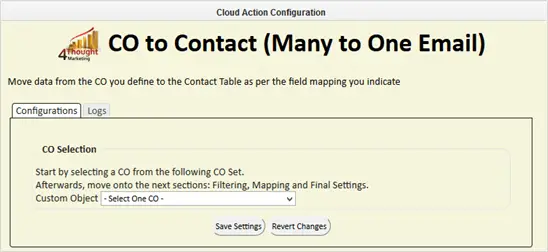
Indicate the Custom Object (CO) which contains the data that will update the linked Contact records.
Selecting Records Using Filters and Operators
You can now filter the CO records linked to the Contact Record – this step is not required.
- The filtering in this section normally matches the filter on the CO records used in the feeder to the Campaign
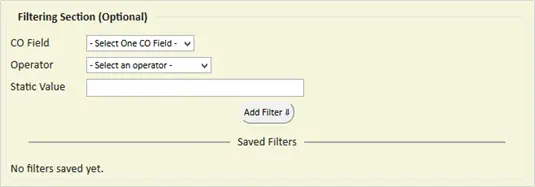
- Select the CO field on which you want to filter
- Select the operator
- Select the value to be compared
- Click the ‘Add Filter’ button
- You may add additional filters using this process – you can include AND/OR logic as well (see example)
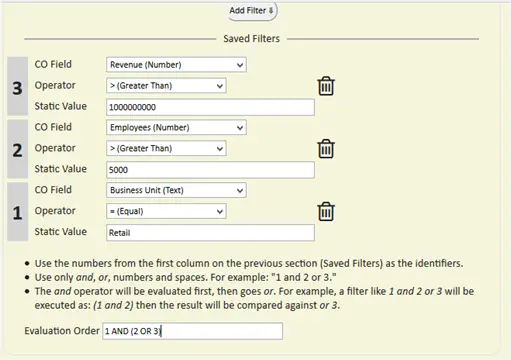
e. The following filter operators are available for your use:
- Equals (=)
- Not Equals (!)
- Contains (~)
- Less Than (<)
- Less Than or Equal To (<=)
- Greater Than (>)
- Greater than or Equal To (>=)
- NOT (in combination with other operators; do not use “NOT” with the following Date operators; Use “NOT” only with one operator, do not use with complex expression: “NOT (Contains)” is ok; “NOT (Equals AND Equals)” is not permissible)
- Within Next (date fields)
- Not Within Next (date fields)
- Not Within Last (date fields)
- Dynamically equal to (date fields)
Be aware of these known Eloqua constraints on filtering
- There is an Eloqua limit of 1,000 characters that can be used to build the filter. The app displays a counter to notify you regarding the number of characters used. When the number gets close to 1,000, the app will not allow any more filter elements to be added
- You cannot use Comma, Single Apostrophe, Parenthesis, Bracket – these are characters used in the Eloqua language
- The “NOT” Operator is not supported when used in complex filters. If used with a single element, it will work. If used with complex expressions, it will return invalid results
- The “NOT” Operator should not be used with date operators.
- Eloqua does not allow more than 2 date fields to be included in one filter
- Using the Dynamically equal to operator requires loading all CO records due to an Eloqua API limitation. This can result in the total records processed exceeding reasonable usage limits.
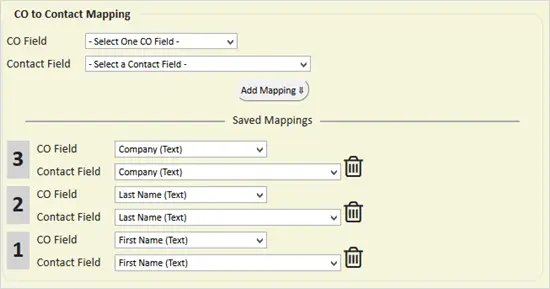
Next, you need to specify the mapping from CO fields to Contact Fields.
Select the CO field and the matching Contact field. Repeat these steps to add all the fields you need. At least one field must be mapped.
Use the trash button to remove a specific field from the mapping area
Marking Records as Processed
In the “Additional Settings” box, select the CO field that will be used to designate the CO as processed. This field will be set to the Campaign ID upon completion of the data move. This field is required only if you know there will be more than one CO record that matches the filter criteria
In the “Additional Settings” box, select a Contact field that will designate no more COs to process. This field will be set to “No” upon completion of the data move. This field is required only if you know there will be more than one CO record that matches the filter criteria

Then click “Save Settings”.
Recommended: Create an element in the campaign in case an error happens, in this example, it’s a Wait Step. Check the box to “Automatically route contacts with errors from cloud app”, select the step where you want the contacts to be routed (in this example, the Wait Step).
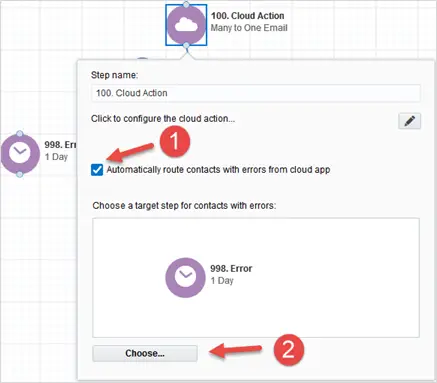
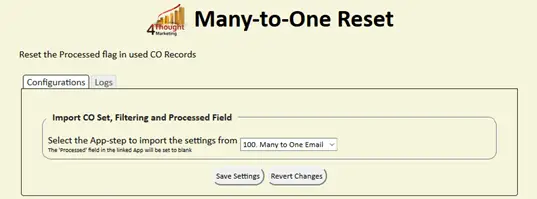
Save the Campaign first and then Configure the Reset step by referencing the Many to One step. The reset steps clears all of the flags used in previous steps to process CO data.
That’s all. Activate the campaign, and see the Many-to-One Email Cloud App in action!
Note: Use of the Bulk processing app
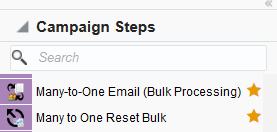
This version is installed when the standard version is installed. It should be used whenever the user expects more than 20K contacts to be added to the step at one time. There is also a M2O bulk reset version which should be used in conjunction with the Many to One Bulk Processing version.
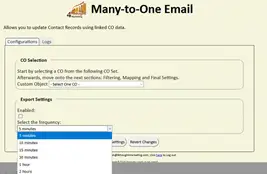
b. We recommend that you select a frequency of 1 hour, all other configurations will be same as standard version.
Troubleshooting
The following is a list of common causes of errors in the Many to One application and how to fix them:
No matching CO records – by far the most common cause for contact records to receive an error and move to the Error step. Often data will change after a campaign has been initiated. If a Contact enters the Many to One step, and there are no longer any CO records that match the filter criteria, an error will be identified and the contact record will be routed to the Error step if you have identified one. This will also show up in the error logs.
- To address this issue, you will have to either remove the contact from the campaign, or modify the data in the CO record to match the filter criteria
Timeout – if the Eloqua API has issues, it is possible for the interaction between the app and Eloqua to timeout. If this occurs, the app will attempt up to 3 times to make connections and continue processing records. Only after 3 unsuccessful attempts will an error be registered, and the record moved to the error step.
- To address this issue, you should move the contacts from the error step to the step just prior to the Many to One app. If this problem continues, please contact support.
Configuration screen not available – After an Eloqua upgrade, it is possible that the configuration screen is not available. This does not affect any configurations already in place, but may make it difficult to configure new instances of the app.
- To address this issue, first try closing and then re-opening the configuration screen. If that does not resolve the issue, then try re-installing the app from the app cloud setup screen. If you continue to have a problem, contact support.
Note: Most 4Thought Marketing apps use the Eloqua BULK API to export/import records, therefore when an app is used in a campaign or program the user that activates the campaign should have the following permissions:
• API
o Consume API
• Contacts
o Upload Contacts/Prospects/Companies
o Manage Data Export
o Manage Contacts
License Information
You need a license to configure and execute this Cloud App. If you don’t have a license, an error message will appear on the configuration page.
If you don’t see CO Records being processed by the app, it may be because your license is missing or expired. To obtain a license, contact your account manager or contact us.
- Each Eloqua instance requires a separate cloud app license.
- Each cloud app license includes a reasonable usage limitation of 250k records processed daily and up to 5 app instantiations per Eloqua instance. Higher usage tiers are available at extra cost.
- For additional license details, please review the Cloud Services User License Agreement.


